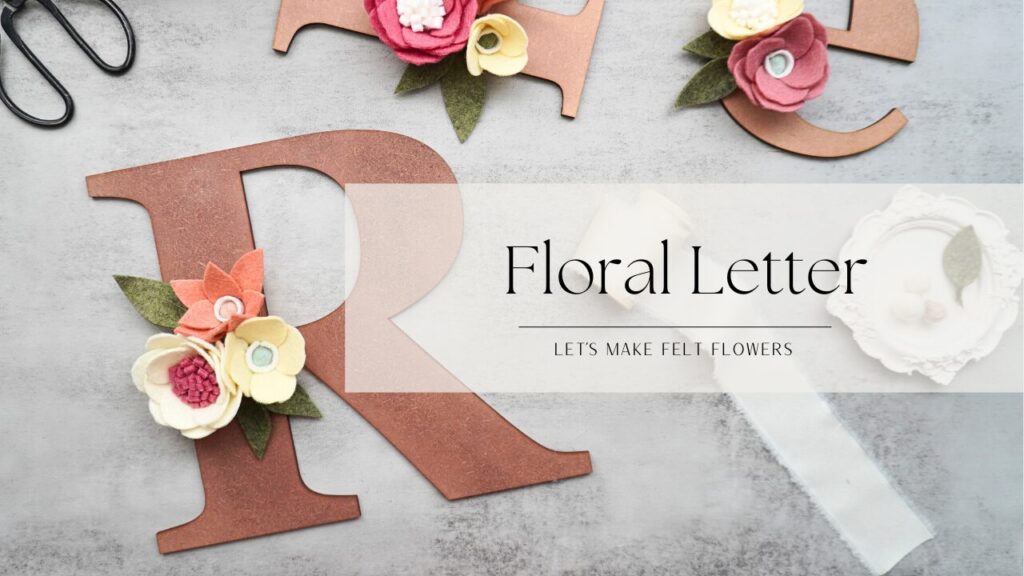
DIY Felt Floral Wooden Letter: A Cute Craft for Kids' Rooms and Special Gifts
22. 07. 2024
Decorating a kid’s room or creating a personalized gift has never been more fun and straightforward!
With a bit of leftover felt, a wooden letter, and some creativity, you can craft a beautiful DIY felt floral wooden letter. This delightful project is perfect for room decoration, birthday presents, or a special gift for a newborn baby. The best part?
You don’t need any special tools. Just cut freehand and play with various shapes and colors to create a unique piece. Ready to get started?
Let’s dive in!
What You'll Need
- Felt: Various colors for flowers and leaves.
- Fabric Scissors: Sharp enough to cut felt smoothly.
- Felt Balls: For flower centres and added texture.
- Wooden Letter: The base for your floral design.
- Glue Gun: To assemble your masterpiece.
Step-by-Step Guide
1. Gather Your Materials
Before you start, ensure you have all the materials on hand. Felt can be bought in small sheets or rolls, and you might already have some leftover pieces from previous projects. Choose a variety of colours to make your floral letter vibrant and eye-catching.
2. Choose Your Wooden Letter
Select the wooden letter that matches the initial of the recipient’s name or any letter that holds significance. Wooden letters are available in craft stores and online in different sizes and fonts. Opt for one that has a flat surface for easy gluing.
3. Cut Out Felt Flowers and Leaves
Using your fabric scissors, cut out different shapes for flowers and leaves from the felt. Don’t worry about perfection—freehand cutting gives each piece a unique and charming look. Here are some ideas:
- Flowers: Circles, petals, layered flowers with varying sizes.
- Leaves: Simple leaf shapes, pointed or rounded.
Experiment with layering different shapes and colors to create dimension and interest.
4. Assemble Your Flowers
Create your flowers by layering different shapes and securing them with glue. Add a felt ball in the center of each flower for a cute and polished finish. Let your imagination guide you in creating different flower designs.
5. Arrange Your Design
Before gluing anything down, lay out your flowers and leaves on the wooden letter. Play around with the arrangement until you’re happy with the design. This step allows you to see the overall look and make adjustments as needed.
6. Glue Everything in Place
Once you’re satisfied with the arrangement, start gluing the pieces onto the wooden letter. Use the glue gun to attach each flower and leaf, ensuring they are securely fixed. Be careful with the hot glue, as it can burn your fingers.
7. Final Touches
After gluing all the pieces, check if any edges need a bit more glue. Make sure everything is firmly attached and add any last-minute embellishments if desired.
Display or Gift Your Creation
Your DIY felt floral wooden letter is now complete! This charming craft is ready to adorn a kid’s room, serve as a thoughtful birthday gift, or welcome a new baby into the world. The vibrant colors and handmade touch make it a cherished item that will be appreciated for years to come.
Crafting a DIY felt floral wooden letter is a simple and enjoyable project that yields beautiful results. With just a few materials and a bit of creativity, you can create a personalized and heartfelt gift or decoration. So gather your supplies, let your creativity bloom, and try this delightful DIY project today!